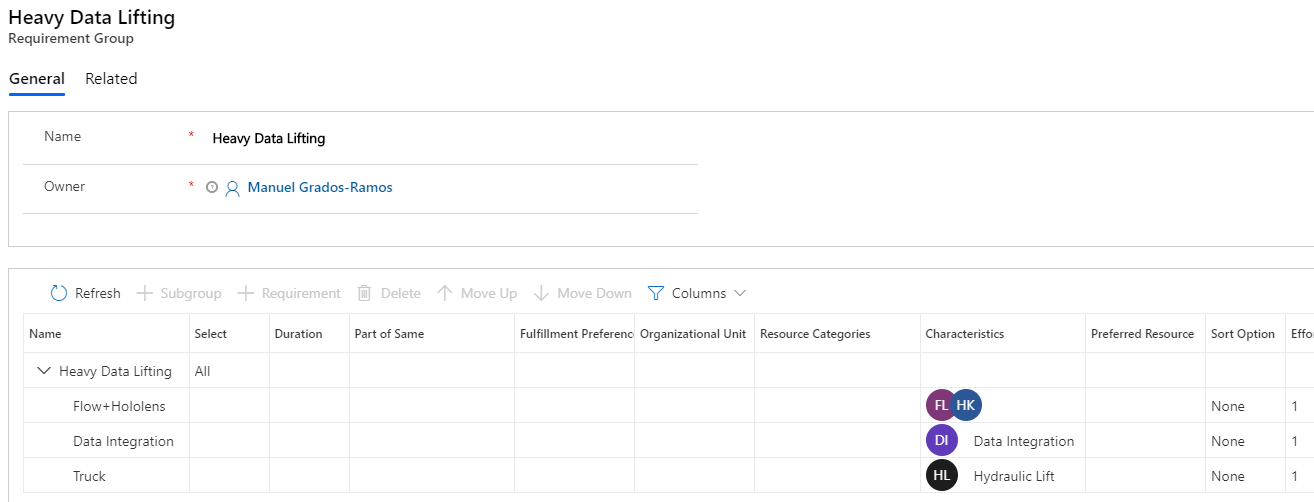
Let’s assume you have this setup of a Requirement Group Template:
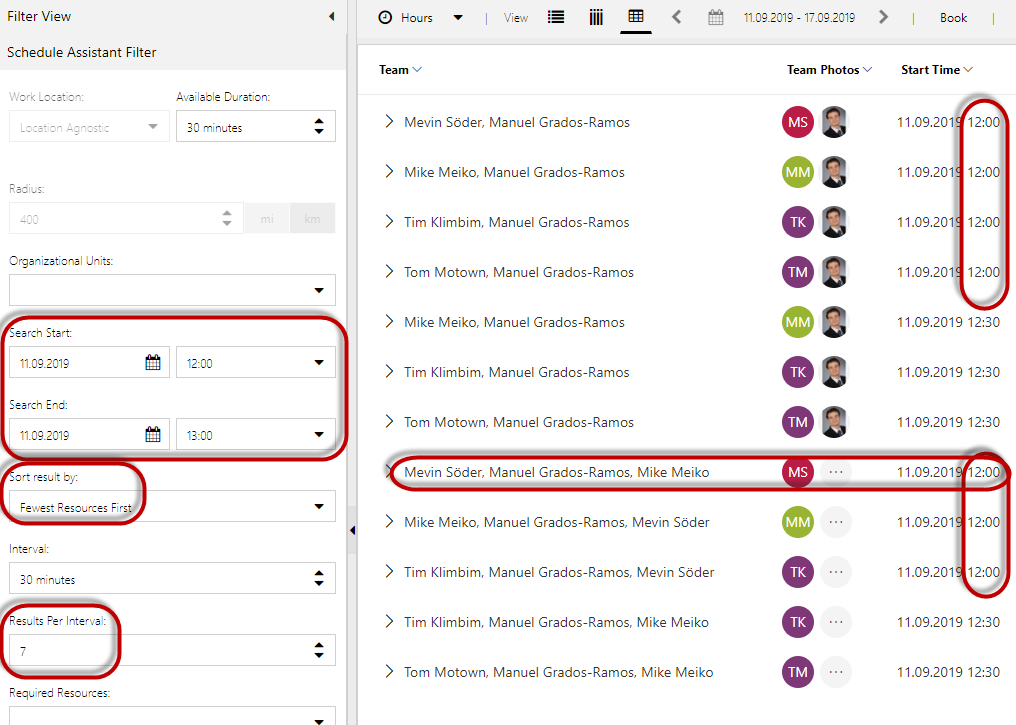
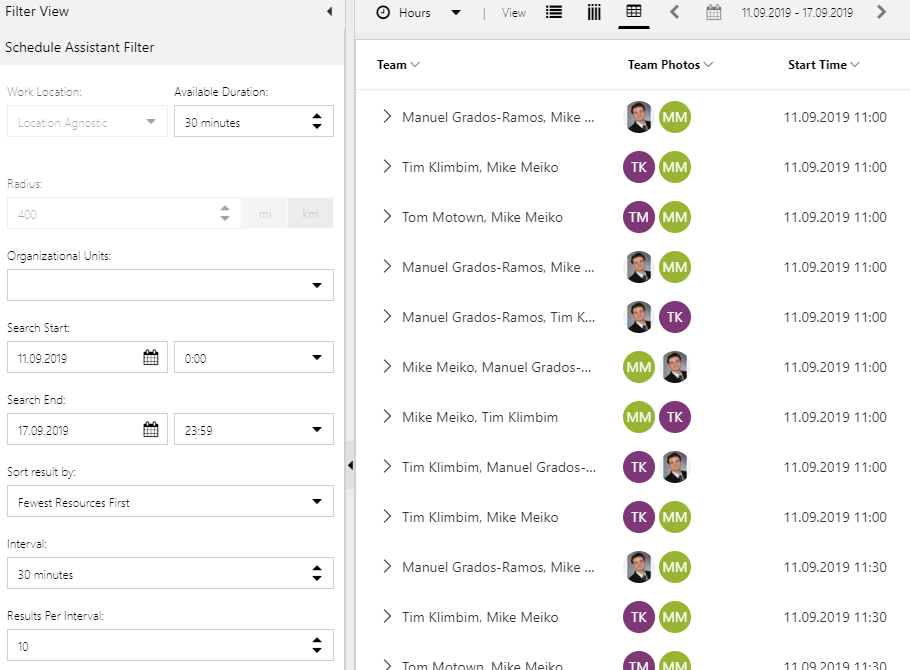
Because in the Schedule Assistant default value for Sort result by is always Fewest Resources First, you should maybe keep time between Search Start and Search End rather small.
Because only than you are able to see all possible combinations on one screen.
See here that even when Results per Interval was set to 7, in your result list you first get 4 results for an intervall and than only further down in the list you will get the remaining 3 results for the same interval.
This could especially be helpful if you prefer to send 3 Juniors instead of 2 Seniors to a job.
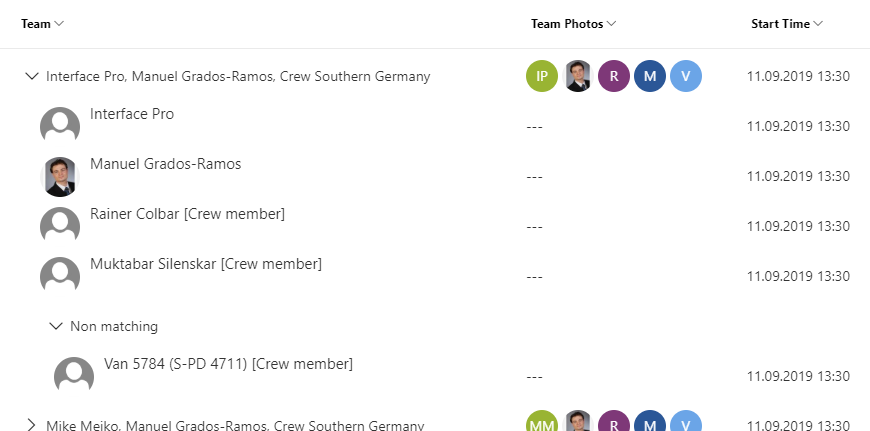
Non-matching members of a Crew that are going to be occupied as well by booking a Requirement Group are shown in Schedule Assistant in a separate grouping titled “Non matching”:
This provides a great overview of those capacity laying idle when scheduling the proposed booking.
Requirement Groups – options for alternative combinations
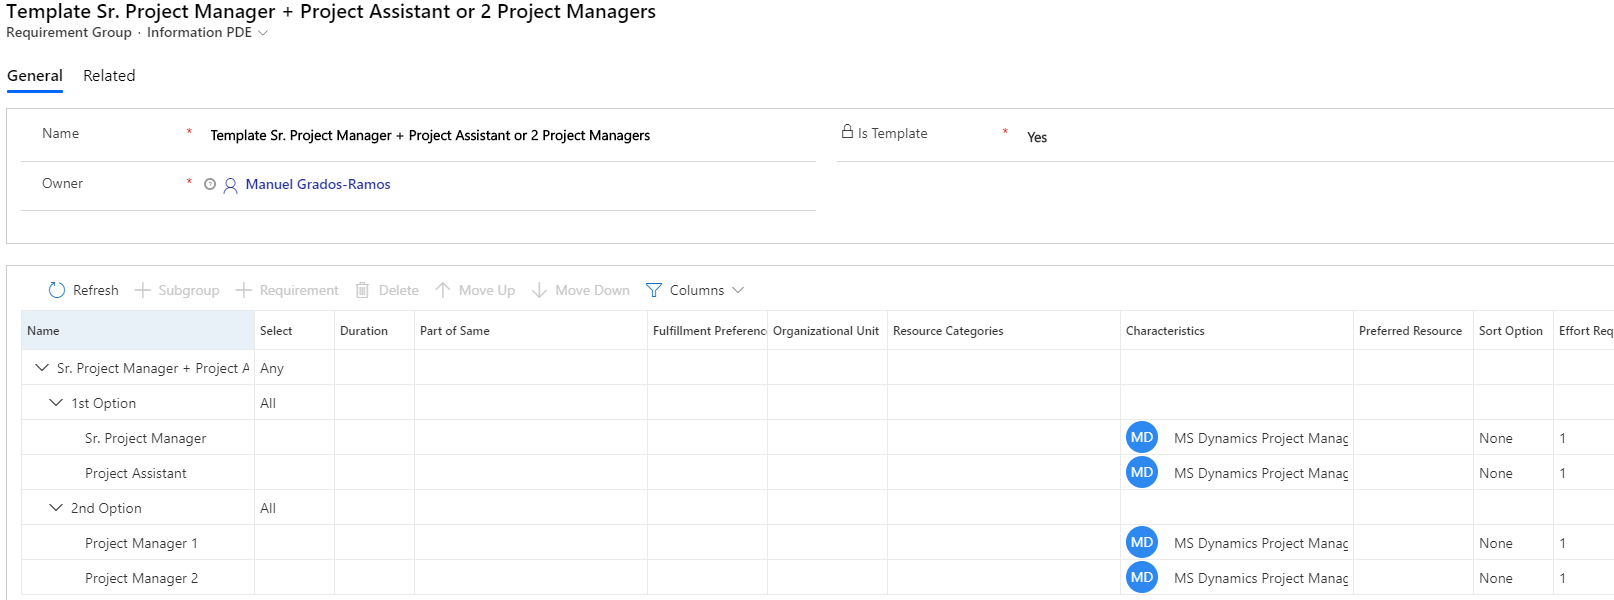
When creating a Requirement Group or a Requirement Group Template we are able to configure several possible combinations of Group members within one Requirement Group.
Example: We have a large Implementation Project and need two Project Managers. But these could either be one Senior plus one Junior, or alternatively two Project Managers on the Advanced level.
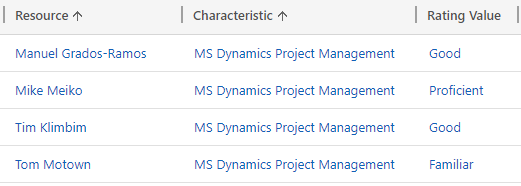
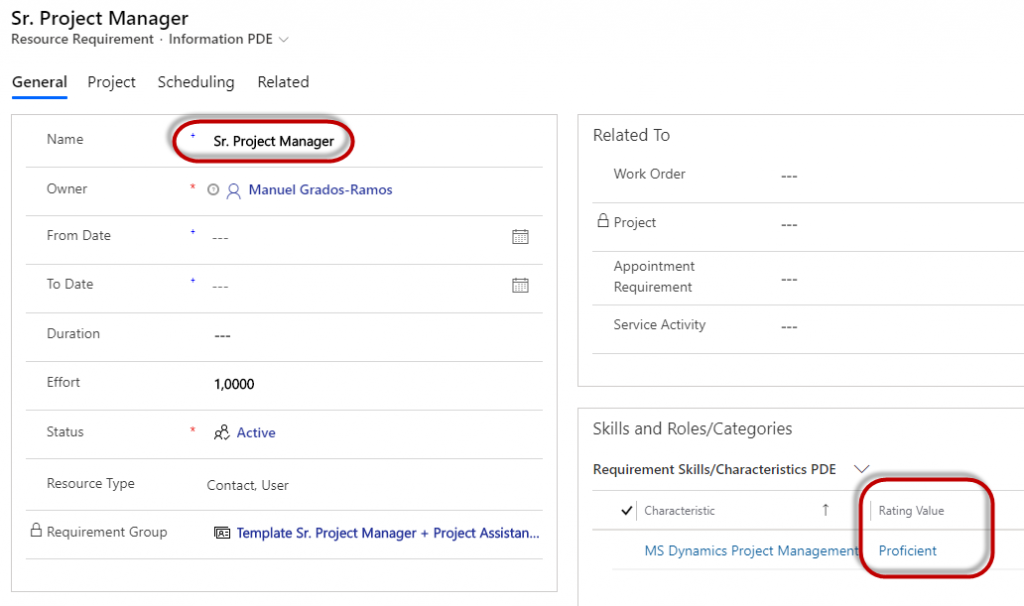
Our Resources are set up with these Skills and Rating Values:
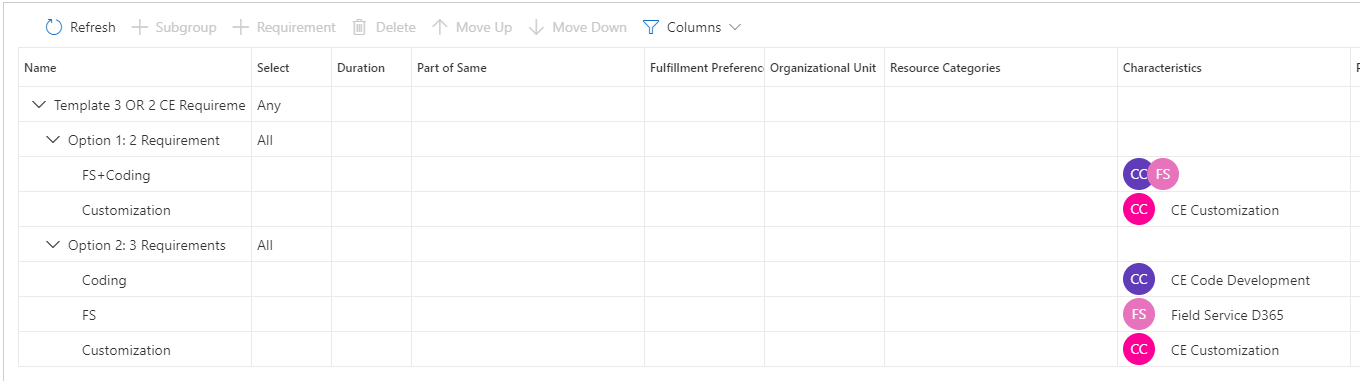
Our Requirement Group (Template) will look like this:
Additionally I have opened each of the four Requirements of this Group configuration and set the corresponding Rating Value:
When we than execute the search by hitting the Book button in the ribbon of the Requirement Group (Template), and raising the Results Per Interval to 10, we’re getting these results:
Recognize that we are getting all possible combinations of Resources to fulfill each of the Requirements with an appropriate skill level in the configured combination and the system also respects our Rating Value. For example it does not propose to create a Group of Tom and Tim because Tom has only a low skill level (familiar) that would require a Senior (proficient skill level) on his side according to our configuration.
Requirement Group functionality
you can’t schedule Requirements that are part of a Requirement Group by using the Schedule Board. Use the Book-button from the parent record instead.
Requirement Groups are possible for Onsite, Location Agnostic and Facility Work Locations.
Always the same for all Requirements of a Requirement Group (updating them on one Requirement updates them on all others from the same Group automatically):
Duration (also gets auto-populated/updated from ‘Work Order’.’Primary Incident Estimated Duration’)
Fulfillment Preference
Work Location (also gets auto-populated/updated from Work Order changes)
Latitude/Logitude (also gets auto-populated/updated from Work Order changes)
From Date / To Date (also gets auto-populated/updated from ‘Work Order’.’Date Window Start’ /’Date Window End’).
Hints for working with Requirement Groups in Work Orders (by leveraging Incident Type Requirement Groups)
Preferred Resources
If a Primary Incident Type that contains an Incident Type Requirement Group has been used in a Work Order, than the Resource Preferences which are kept as child records of the Service Account are not auto-populated neither into the Work Order nor into the Requirement Group based Resource Requirements of this Work Order.
However we can associate Preferred Resources to the Requirement Group Template.
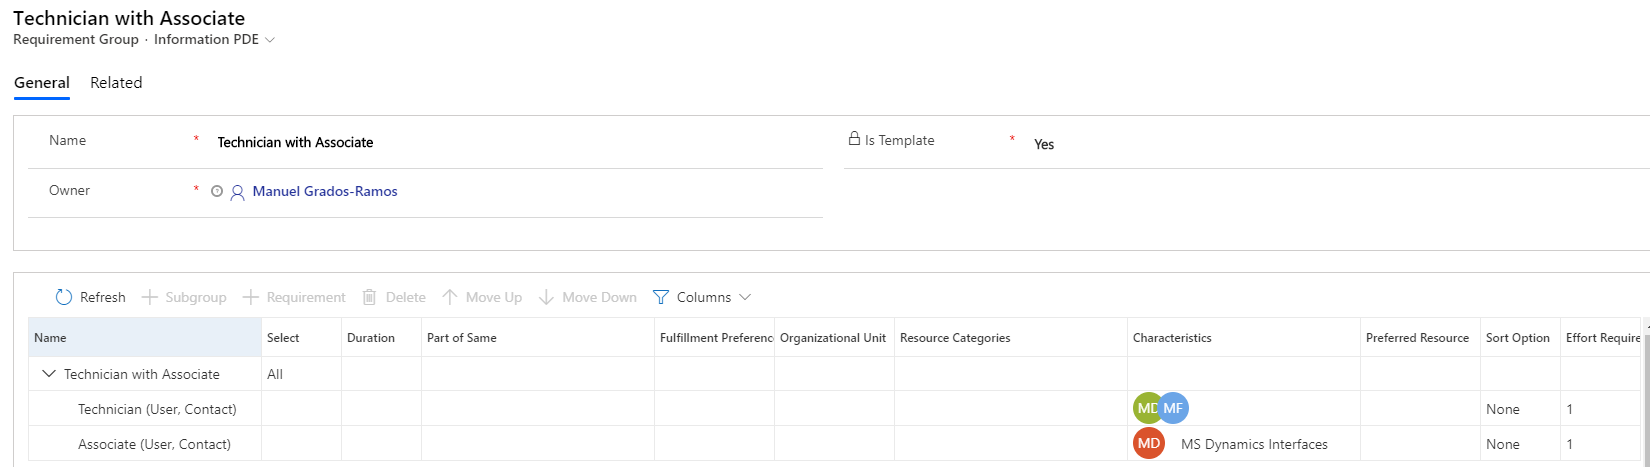
Here a Requirement Group Template without preferred Resources:
Leading to these search results when setting the Results Per Interval to 3:
But if we now add two defined Resources into the Preferred Resource field of our “Associate”-Requirement of the Requirement GroupTemplate:
and than perform the search again with the setting of 3Results Per Interval, we’re only getting two results per interval back:
This is because we have restricted the number of possible Resources for one of the Requirements to two. And because we don’t have any other Resources available which could fulfill the “Technician”-Requirement, there are only two options left per interval.
So if you have large customers who each have a certain selection of possible Resources (similar to Resource Preferences under the Account record), than you could create one Incident Type per large customer that, in combination with one Requirement Group Template per large customer, serve as a replacement of the Preferred Resource (Resouce Preferences with Preference Type: Preferred) under the Account.
Technically the entity Requirement Resource Preference serves as a container for Preferred Resources under a) the Account b) the Resource Requirement of a Work Order c) the Resource Requirement of a Requirement Group Template
Now I’m going to show you how these can be leveraged when using Work Orders.
Configure the Incident Type
create a Requirement Group Template as explained in above mentioned article
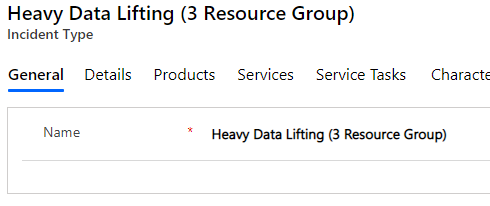
create a new Incident Type: Field Service=>Settings=>Incident Types=>”+ New”
Give the new Incident Type a name (my recommendation: provide a hint in the name that helps you later on to remember that this Incident Type is based on a Requirement Group):
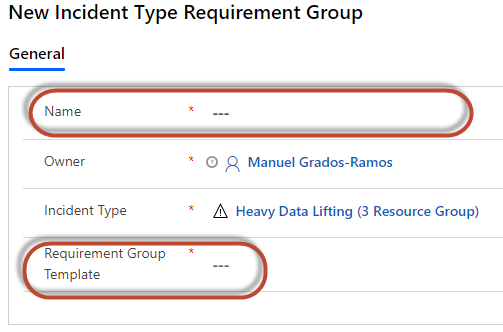
4. On the Incident Type form, go to Related=>Requirement Groups 5. create a new Incident Type Requirement Group:
6. associate the formerly created Requirement Group Template to it via the lookup field 7. provide a name to the record and save it.
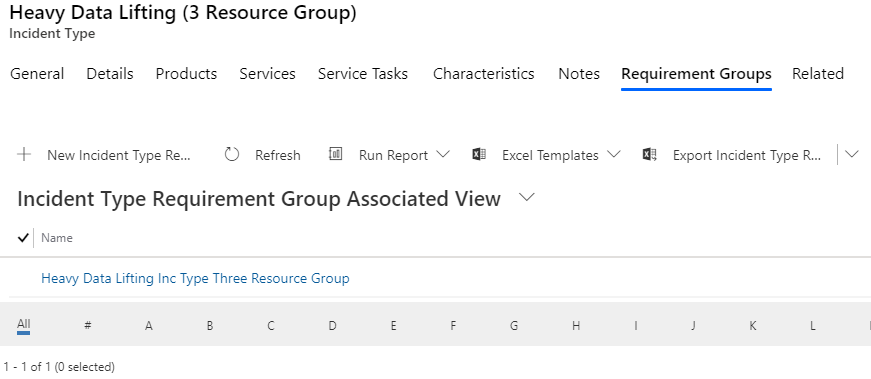
So you should finally get something like this:
Test it with a Work Order
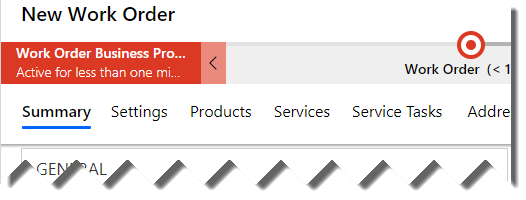
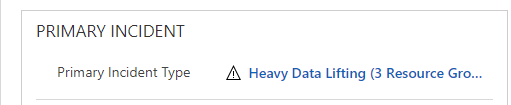
Now its up to you to test the whole setup. For doing this you just need to create a new Work Order and fill in our new Incident Type into the field Primary Incident Type on the Work Order form:
Note: With a standard Field Service setup you necessarily need to provide the group based Incident Type in the field Primary Incident Type BEFORE you save the Work Order the first time. Otherwise you’ll get an error saying “You can’t add an incident that is related to a requirement group template to a work order if there is already a requirement related to this work order.”
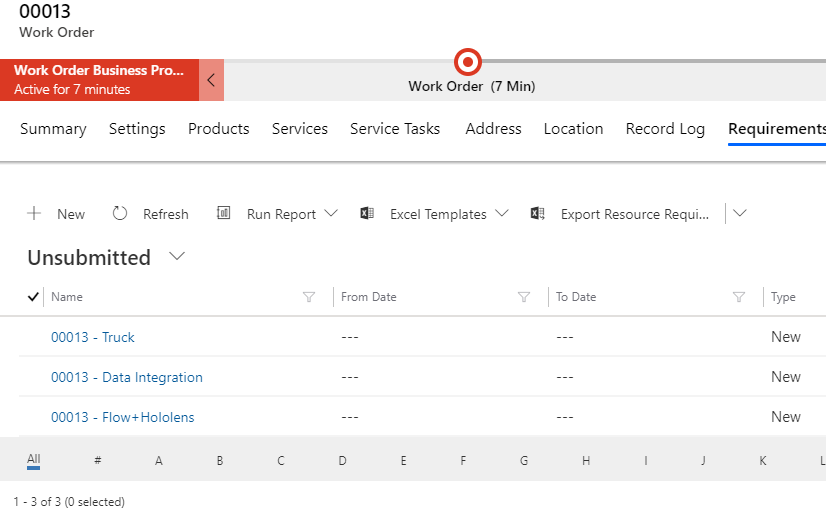
Than you can check if your Requirements have correctly been associated with the Work Order. For doing so you need to go to: Related=>Requirements=> change the View to “Unsubmitted“:
Customized Work Order form and Requirements view
Customization recommendation (especially if you more often have group based Requirements): create your own Resource Requirement view for the Work Order form.
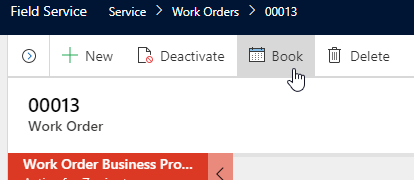
And now the big moment comes: hit the Book button on top of the Work Order form:
You should now get search results according to the available Resources, the distance to the Service Location and the other parameters like Work Location, Organizational Unit, Resource Type and so forth:
Note: if you are going to use the same or a similar combination of Resources more often, it makes sense to create Requirement Group Templates whereas if you need a certain combination of Resources/Skills only one time it would theoretically be enough to create a Requirement Group without a Template. However it seems like if go down that road, you will not be able to associate your Requirement Group to a Work Order anymore later on. At least I couldn’t find a way to do that. That means that if you want your Users to be able to click the Book button on a Work Order and have the fancy algorithm execute its sophisticated multi-resource query, you will always need to create an Incident Type for it first and associate a Requirement Group Template to it.
What you can do is going back from a created Work Order that has a Requirement Group associated via =>Resource Requirement=>Requirement Group (or simply from the Field Service menu: Requirement Groups) and there editing the instance of the Requirement Group that is responsible for your Work Order. This method allows you to create a kind of a standard Incident Type Requirement Group and Template which you always use for creating a new Work Order when you want to leverage the Group functionality.
Cascading & sync of attributes within the Requirement Group
a) Cascading attribute changes from Work Order to Requirements
(as of Sept. 2019)
gets initially populated and auto-updated for the Resource Requirement with flag “Is Primary“ only:
Time From Promised/Time To Promised
Time Window Start/Time Window End
Service Territory (remove)
gets initially populated and auto-updated for all associated Resource Requirements:
Duration
Date Window Start/Date Window Start End (into fields From Date / To Date )
Latitude/Longitude
Work Location
Service Territory (Create, Change)
b) Attributes kept in sync between Resource Requirements
Duration, From/To Date, <long/Lat, Work Location are always kept in sync within the Requirement Group, even when changed on a non-primary Requirement.
Service Territory however is only kept in sync, when it was changed from the Work Order AND the change was not a removal of the field content. So you can open the non-primary Requirements and assign different Territories to each.
As an example you might end up having Requirements like this in the end:
– Time Promised From/To and Time Window Start/End is only populated to the primary Requirement – Territory has been removed from the Work Order after initial creation: this removal is cascading only to the primary Requirement (whereas an UPDATE/CREATE of the Territory would have been cascaded to all Requirements)
When asking yourself why is there a difference of cascading between Time Promised/Time Window vs. Date Window you can come to the assumption that it has to do with the Requirement Group functionality. If we check the UI (screen below) we can easily see that there are only the From Date / To Date fields (which are the counterparts to Date Window From /To from the Work Order). So Microsoft only takes care for a synchronization of these fields within a Requirement Group but not for the other Date/Time fields.
I was asking myself how can you have differing values in the Time Promised fields for Requirements of the same Requirement Group? As soon as you are scheduling or re-scheduling them, all of the Bookings based on these Requirements get moved simultaneously. However it could make sense if you have a scenario where a team gets a Booking for a longer period of time (i.e. traveling on site together) but the actual “ToDo” of a Resource would only be for a shorter time frame and you want to keep this information somewhere. If you are going to use it this way you should surely not create a hard booking restriction – for example with a Real Time Workflow – which forces you to not book outside of time promised from/to.
Also note that a Time From/To Promised on one of the non-primary Requirements will be ignored completely by the Schedule Assistant. However a Time From/To Promised on the Primary Requirement is a hard selection criteria for the Schedule Assistant, even if it doesn’t show these fields in the Filter panel, when scheduling a Requirement Group [improve@MS].
After we have taken a look into Resource Crews let’s now explore what Dynamics 365 Customer Engagement can offer with Requirement Groups.
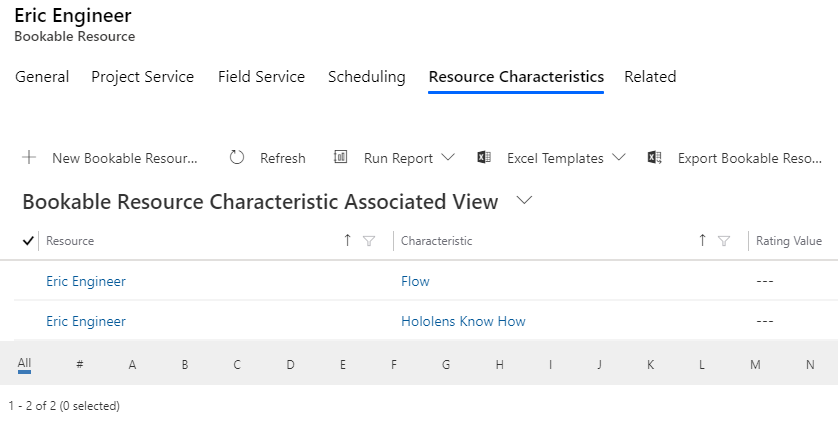
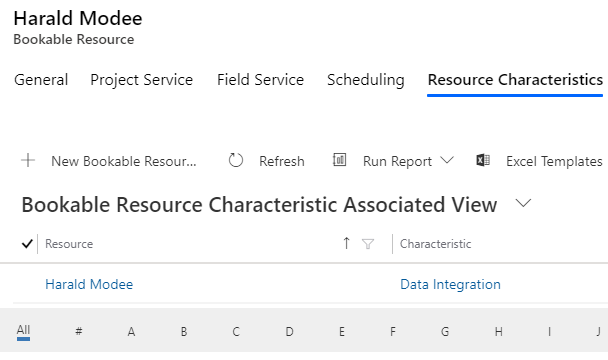
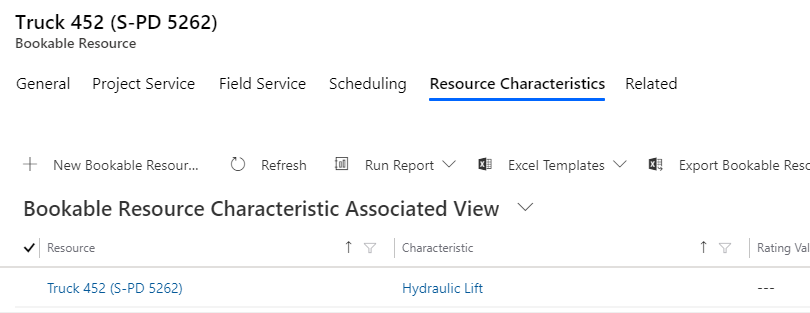
create three Resources, each with differing skills: Go to Field Service=>Resources=>”+ New” and create a) One User with Skills: Flow, Hololens Know How. b) One Contact with Skill: Data Integration c) One Equipment with Skill: Hydraulic Lift
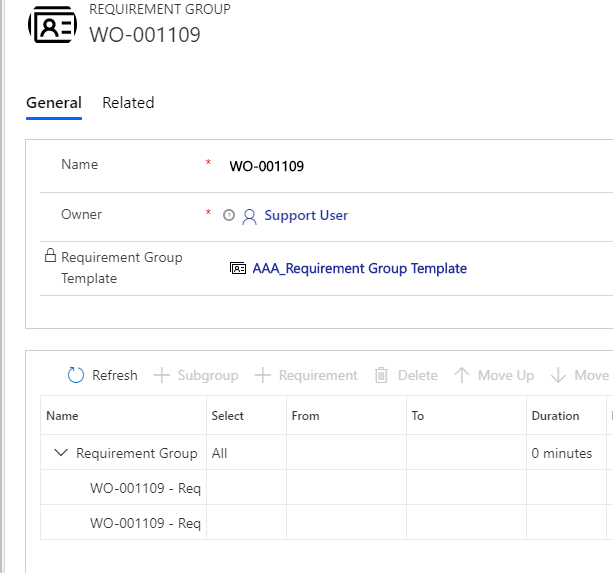
2. create a Requirement Group Template. Go to Field Service=>Resources=>Requirement Group Templates=>”+ New” a) provide a Name, save b) click into the first row from the subgrid and click “+ Requirement“ c) now add three requirements for getting back proposals for a team of three people and add corresponding skills d) at the Truck Resource click on Open Form to determine which Resource Type (Equipment in this case) you are expecting
Difference between Requirement Group and Requirement Group Template
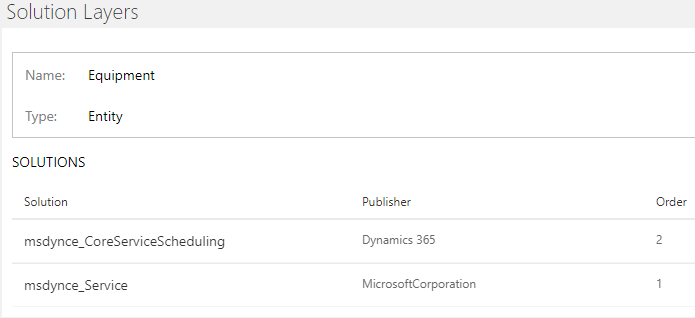
A bit confusing is, that as soon as you open a Requirement Group Template form, the menu on the left jumps back as if you would have opened a Requirement Group instead of a Requirement Group Template. [improve@MS] Reason: technically Requirement Group and Requirement Group Template are the same entity msdyn_requirementgroup where only the records are differentiated by a flag called “Is Template”.
The title of the new-form “New Template: …” gives you the indicator that you’re creating a new template. But if you’re going to edit an existing Requirement Group Template you feel like editing a Requirement Group instead. I would therefore recommend to make the flag “Is Template” visible but read-only on the form.
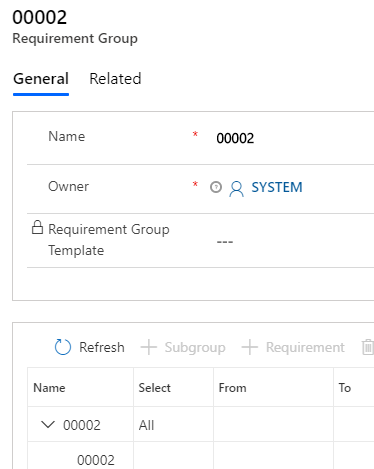
If you pay close attention you recognize another difference: the lookup field Requirement Group Template is only visible on the Requirement Group form:
The field Requirement Group Template is read only for saved records.
That brings us to the interoperability of the two: if you create a new Requirement Group the above mentioned field gets unlocked so you can choose a Requirement Group Template to start from.
Book a Requirement Group
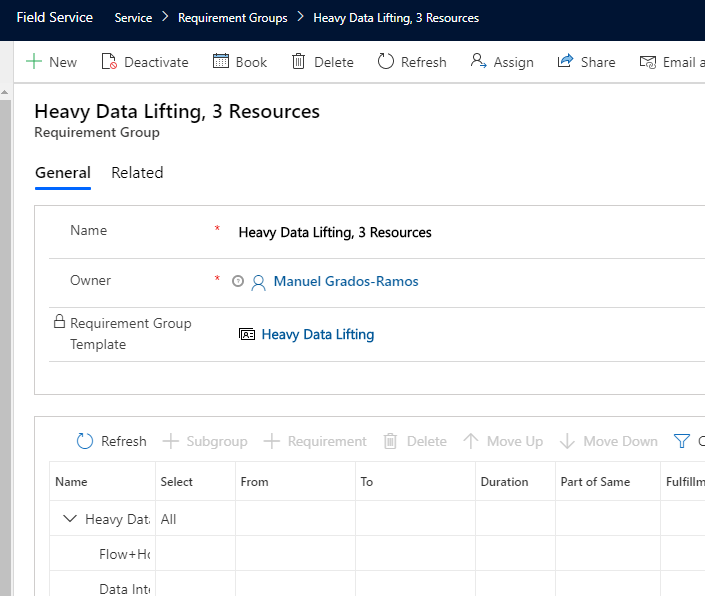
If done with editing the requirements you can click the Book button directly from the Requirement Group ribbon:
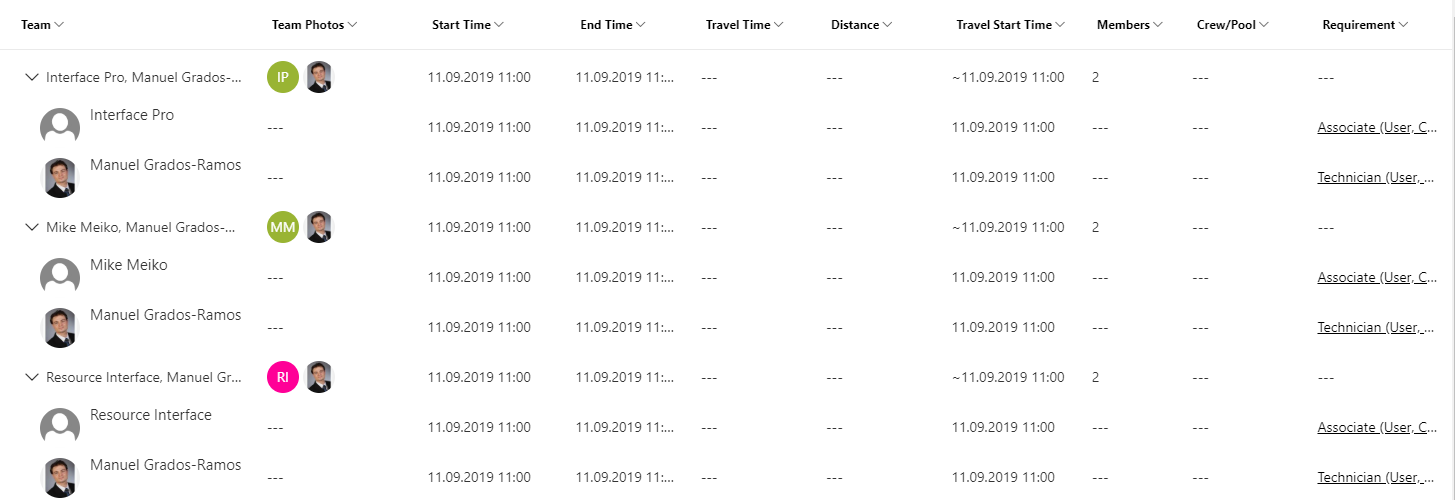
This will open the Schedule Assistant with a list of appropriate Resource combinations. In our example the three Resources we have configured in step 1:
On the result list you than can
open each result row’s group to see its members
see which of the Requirements are going to be fulfilled by which of the found resources (last column)
adjust filter criteria and repeat search execution
book one of the groups by clicking on it => Book & Exit on the right flyout
If you’re not getting any results you should
probably need to adjust your search criteria
check if you have appropriate Resources in the system at all
check whether your Requirements do have a Service Territory associated but your Resources haven’t
Requirement Group in Schedule Board
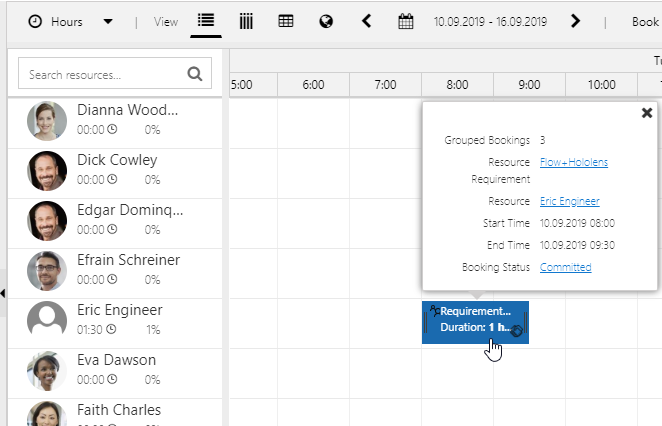
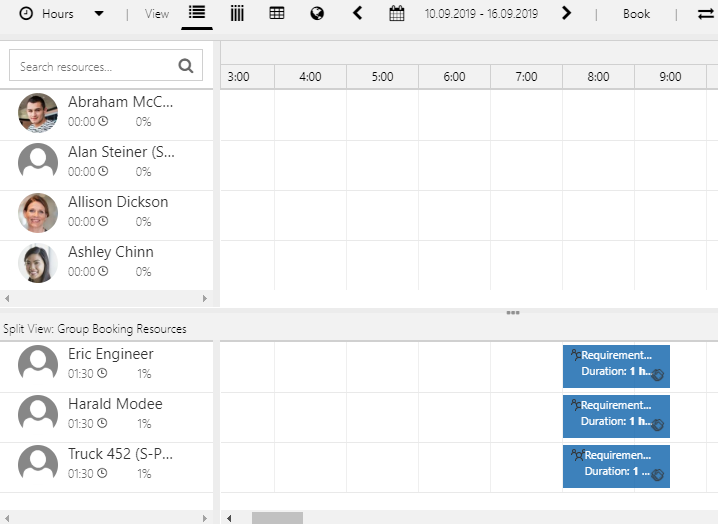
If you now open the Schedule Board you could find something like this (too many Resources to have an easy overview):
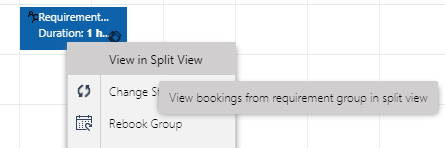
Hovering over the booking panel (screenshot above) tells you that you have a Grouped Booking. So maybe you want to do a right click at the booking and choose Split View:
Shows you all bookings from this group (only those Resources which are on the same page of results, so you might want to increase the number of Resources per Page in Schedule Board tab settings and/or adjust your Resource filter to see all group members).
If you now drag and drop one of the bookings to a different starting time, all other bookings of this group will be shifted automatically too. Cool! That is what our customer wants! However compared to the same procedure with a Resource Crew you don’t see the shifting immediately happening on the board, instead you need to hit the refresh-button at the top of the Schedule Board tab once to see your bookings being shifted [improve@MS].
If your customer is asking you which possibilities with Dynamics 365 Field Service you have to book several Resources for one Work Order, you will have plenty of them in mind.
So lets further specify the requirements:
scheduling of several resources for a Work Order all at once
if appointment dates have to be postponed, the bookings for all of the Resources should be postponed all at one
Let’s directly jump into trying that out! So I want to create a Crew out of 3 Resources: one User, one Contact and one Equipment.
Go to Field Service (App)=>Resources(Area)
Let’s create three Resources which you want to be Crew members: a Contact, a User and an Equipment
“+ New” on top of Resource list =>
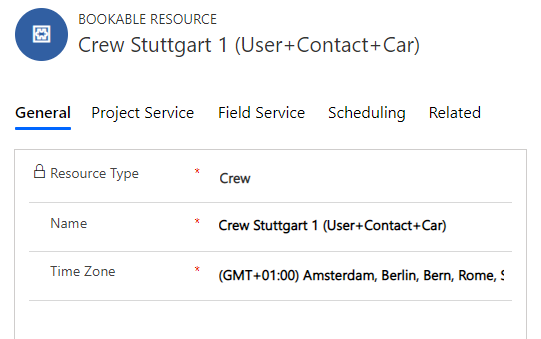
set Resource Type to Crew; provide a Name to the Crew:
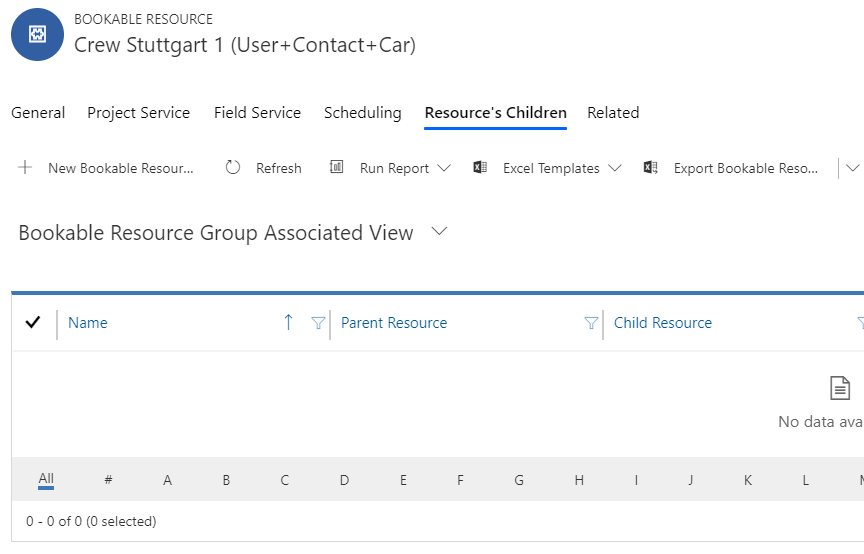
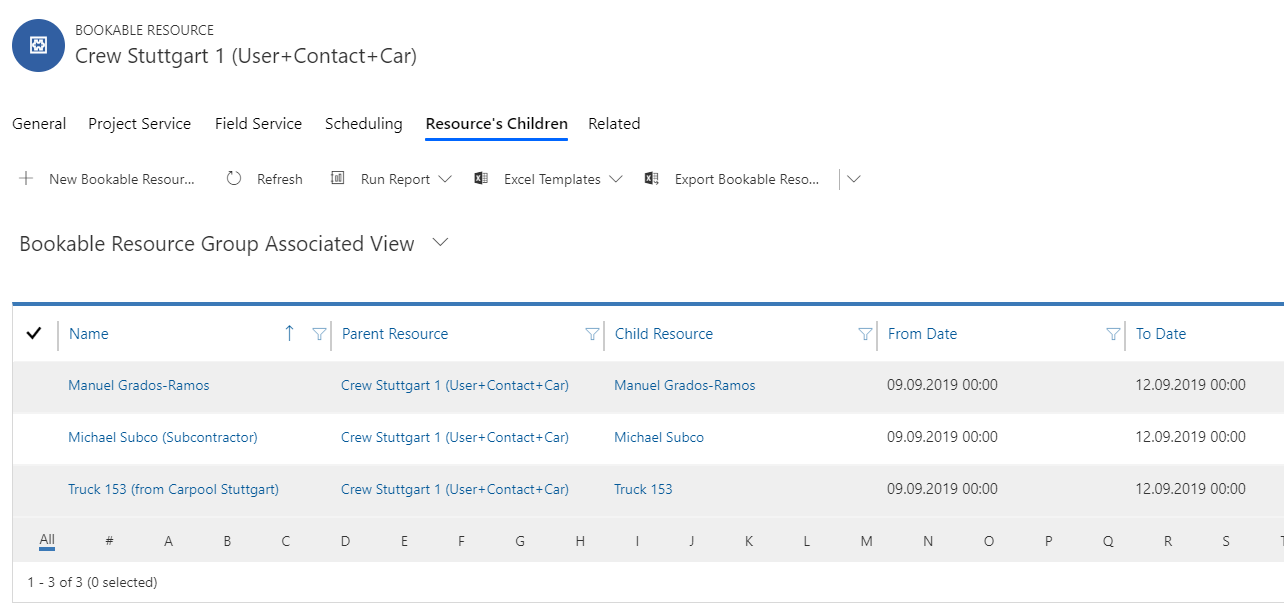
5. in your Resource of Resource Type “Crew” go to “Related”=>Resource’s Children
6. click on “+ New Bookable Resource Group” 7. for the field Child Resource choose the first crew member and also fill in the Name field 8. for From Date and To Date choose the timeframe in which you want this Resource to be member of the crew
bit confusing here is the naming of the entity: “Bookable Resource Group”. In fact for you this is solely an association between a Resource and a Resource crew (or technically between exactly two Resources).
9. hit Save&Close and repeat step 6 to 9 for all your 3 crew members
Keep in mind that if you want to see all members of a crew you should either go to the Schedule Board (maybe better) or open the “Resource’s Children” subgrid in your Resource form if you have the Resource Type “Crew”.
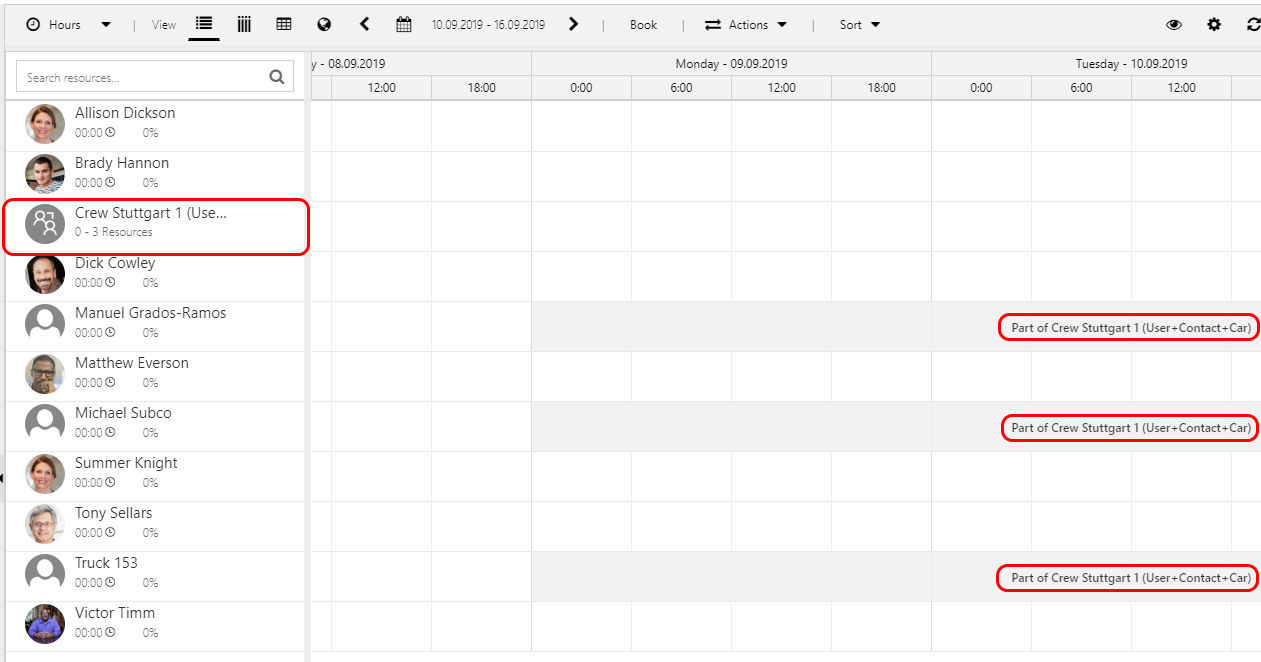
10. now open your Schedule Board. You should see this:
A new Crew Resource is available and the individual Crew members are made unavailable for the time of their crew membership.
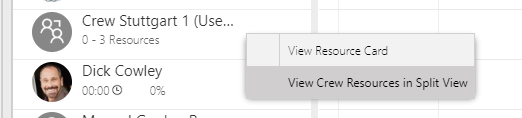
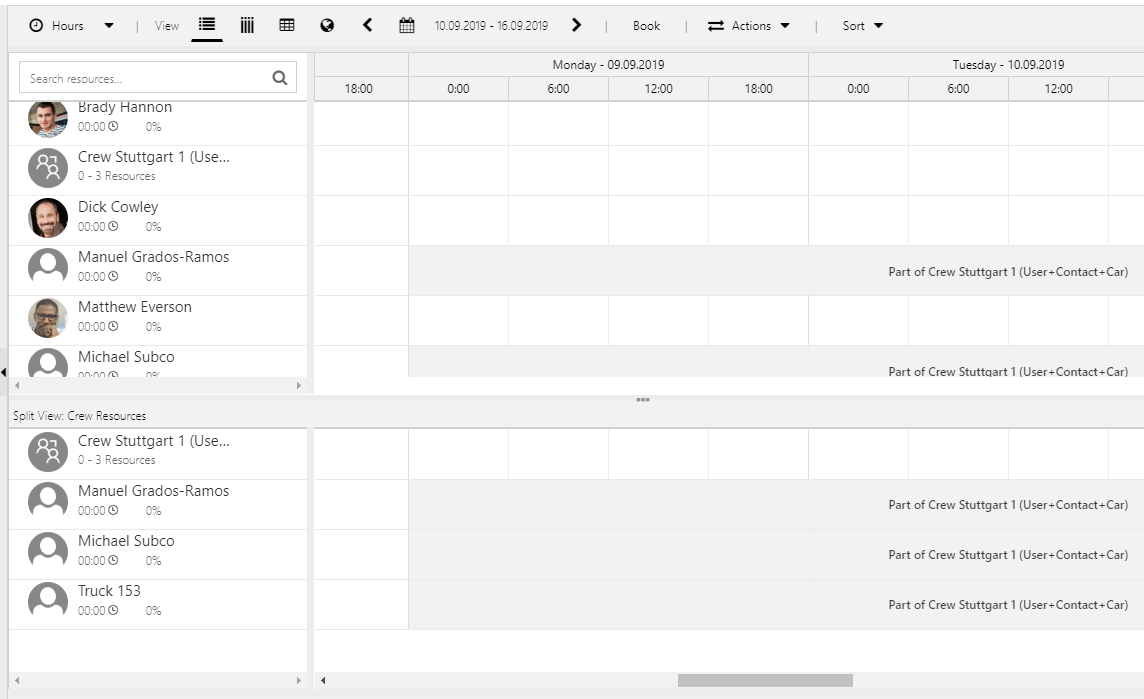
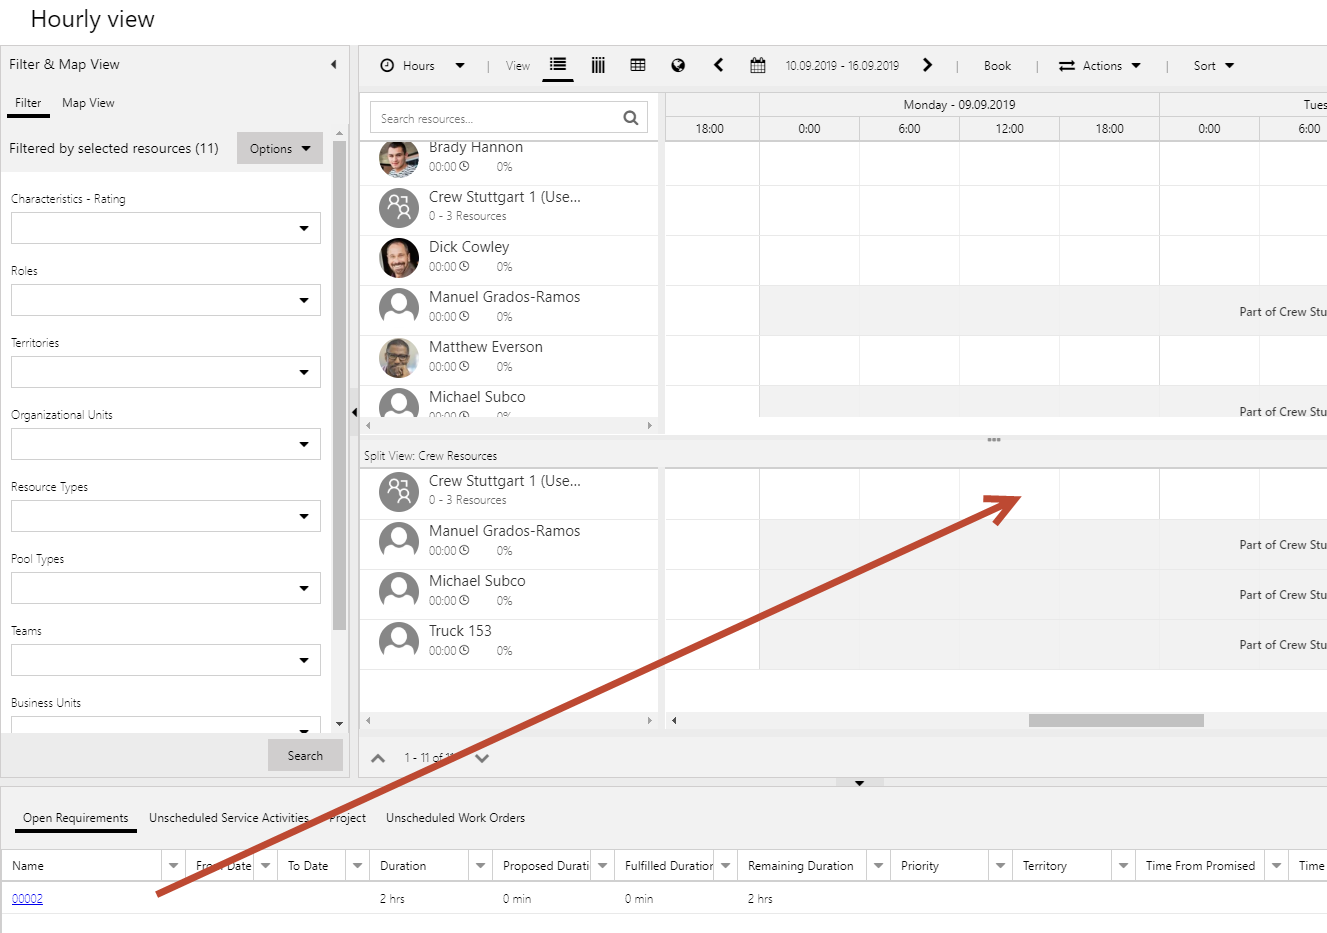
11. you might want to do a right click on your Crew resource and chose “View Crew Resources in Split View
this provides you with an even better perspective:
12. now lets drag and drop one of the Resource Requirements from your Open Requirements list onto the Crew Resource
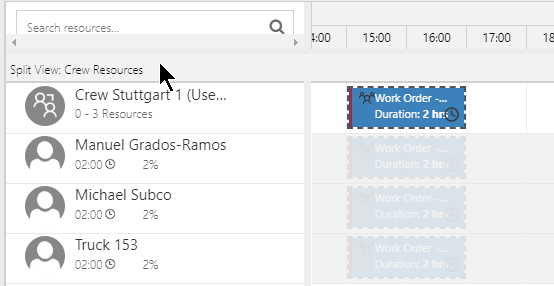
After the system has finished its job (might take a couple of seconds) you will see this:
If I now move the main tile representing the Booking of the Crew by drag and drop, all Bookings for all the crew members get postponed automatically as well.
In Dynamics 365 Field Service you are able to create these types of Resources:
User
Contact
Account
Equipment
Crew
Facility
Pool
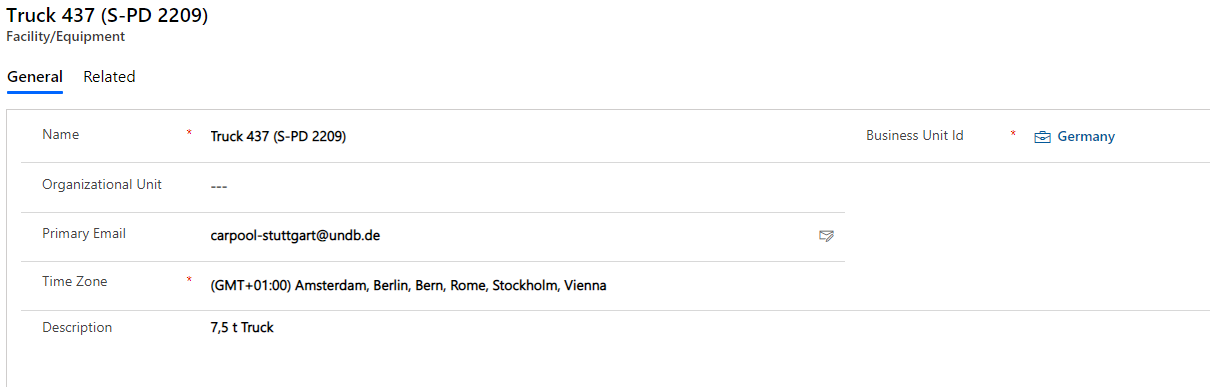
Resource Type: Equipment
Facility Equipment lookup appears and becomes mandatory after this Resource Type has been chosen.
Organizational Unit lookup becomes read only after this Resource Type has been chosen . Gets pulled from ‘Facility/Equipment’.’Organizational Unit’ or, if this is empty, than from ‘Project Parameters’.’Default Organizational Unit’.
Enabled for Field Service Mobile two option set disappears
in previous versions it was called Company Asset
makes sense to be used in a Resource Crew
for example: Truck, Excavator, Beamer, Hololens
Start Location & End Location cannot be set to Resource Address
Resource Type: Crew
Also see here for further details on how to set up a Crew.
Customizations
After I have created a copy of an existing form I faced issues that some of the scripting provided by Microsoft didn’t work anymore. As long as I don’t get further insights into this I would recommend to be careful when taking this road. Better maybe to customize the existing form instead of creating a copy of it for customizations. This, by the way, is also a way that has proved to be more stable when it comes to upgrading your org with latest MS solution versions. We faced lots of scripting errors on forms that we previously have copied. It turned out that MS replaced the JS libraries for the original forms but not for your form copies during the last larger upgrade cycle.
Reachable in menu via Settings=> Business Management.
If you’re opening the form from Unified Interface you’ll see the lookup field Organizational Unit on the form.
For Organisational Unit there is no helpful field description [improve@MS].
But if you’re opening it from the former UI you’ll get another lookup field Site instead:
For Site there is a field description: “Site where the facility/equipment is located.”
So is Organizational Unit the “newer” replacement for Site (at least when it comes to Field Service?
If you are creating a Bookable Resource with Resource Type Equipment than the Organizational Unit gets automatically populated from Facility/Equipment.’Organizational Unit’ into ‘Bookable Resource’.’Organizational Unit’.
Work Hours
There is a Work Hours ribbon button in Unified Interface:
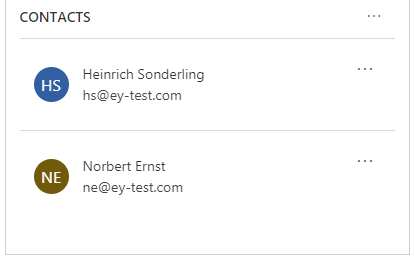
In the new Unified Interface your surely stumbled already over this new Subgrid layout called “List View”:
Standard Layout OOB
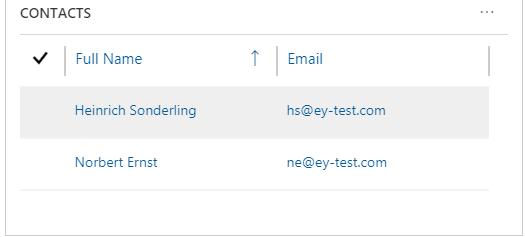
This layout will change to the “old” Grid View as soon as you allow the section to have more horizontal space. This can be done by formatting the Form (or simply make your browser window wider).
This mechanism is called “Reflow”.
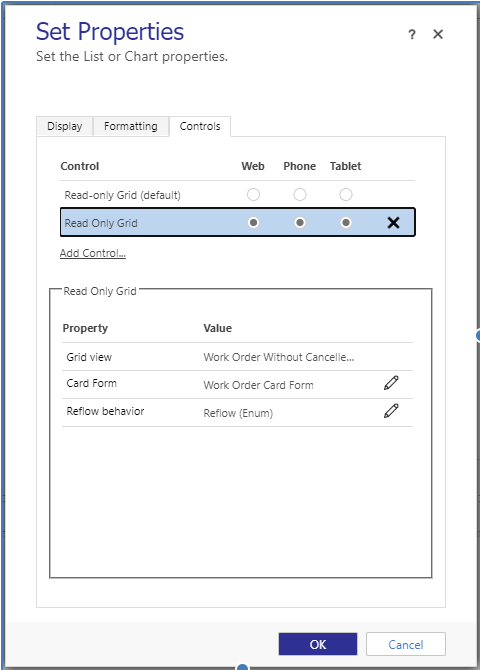
But did you know that you can also determine whether you want to display the Subgrid List View or the “old” Grid View by deactivating Reflow for a certain Subgrid?
Just open the parent Form in edit mode, double click on the Subgrid => Controls =>Add Control… => choose the “Read Only Grid”.
Than you can edit the property “Reflow behavior” to fix the Grid layout to the one or the other View type.
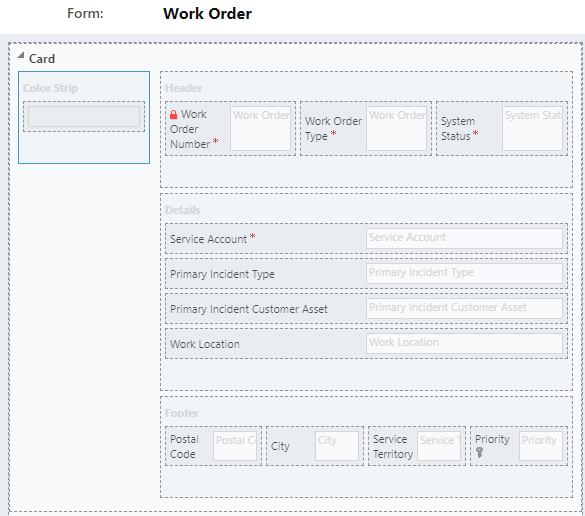
Another very nice feature is that you can customize the content displayed in the “List View” by creating a Card Form and referencing it in the Control properties (see above).
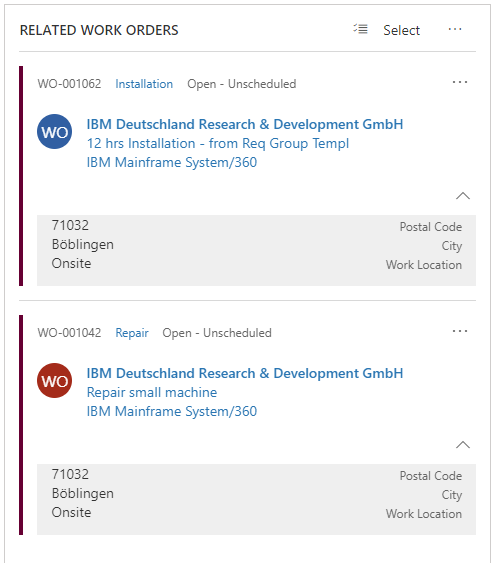
You would than be able to get something like this:
Recognize also the column names appearing for those fields added in the Footer.
For that, create a new Form of the Type “Card” and adjust it as to your needs:
Up to now I couldn’t find out how to get the “Color Strip” working. I tried this without success. There is an Idea out there that indicates that it doesn’t work (yet?). So if you know more please let me know.
You can also add more than three columns into the Card’s body and additional fields into the Header and the Footer of the Card Form. To control whether the footer is expanded by default or not go to System Settings => “General” => “Set the default card state for Interactive Dashboards” => “Display cards in expanded state”. Sadly this setting can be done only once system wide.
But still, I’m really exited by the great capability to customize the List View.
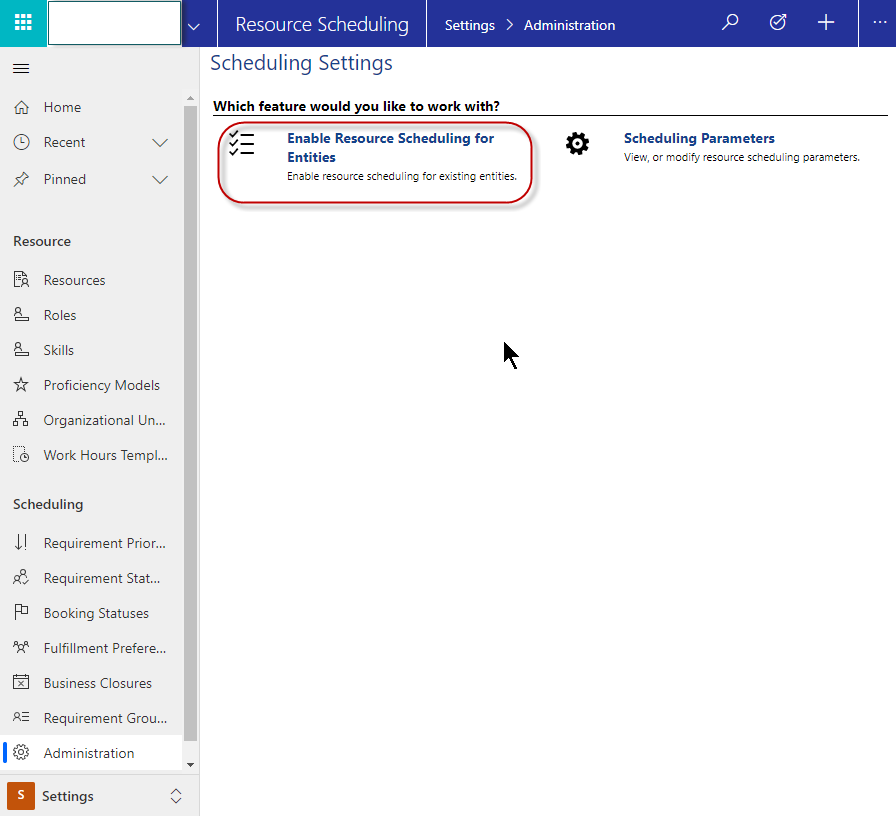
If you’re going to enable another (custom or OOB) entity for scheduling there is a great blog series from Sara Lagerquist (see links below) which has some good tips. Based on these tips I’m listing up some of the most valuable insights when it comes to extend URS functionality when you Enable Resource Scheduling for Entities.
don’t create new relationships from within the “Enable Scheduling” setup wizard as they won’t contain your custom prefix in their technical relationship names
think about doing a more sophisticated field mapping by Workflow instead of only using the static field mapping from the wizard
also take into account to leverage the standard field mappings for the newly created relationships to pass on additional parameters which are not exposed as fields in the wizard
don’t forget to maybe auto create Resource Requirements by another Workflow
also you maybe want to auto-populate Resource Requirement Skills / Characteristics for your new Resource Requirements
for only a limited number of Characteristics you might want to create several new Lookup fields on your newly schedulable entity to the Characteristic entity
for a larger number of Characteristics you could use Microsoft Flow to populate them into your Requirement Characteristic entity. Source for this Characteristics list to be picked up by Flow could be a new sub-entity from your newly schedulable entity (NewSchedulableEntity 1:n NewSchedulableEntity.Characteristics). If you want to make Service Tasks schedulable you could alternatively use the Service Task Type and place a new Subgrid “Service Task Type Caracteristics” there.
Will now be available independent of a D365 Customer Engagement license .
for working with partners, customers, franchisees, external people
allow external users to interact with CDS data
anonymous users or leverage existing login providers like LinkedIn, Microsoft Account and others or enterprise logins via Azure AD, SAML2, OpenId Connect or WS-Fed.
portal designer toolkit (low-code/no-code)
template functionality
responsive
leverage or embed Power BI, Flow, SharePoint, Azure Blob Storage, Azure AD B2C, Azure Application Insights
Dynamics 365 Customer Engagement Stuff – mainly Field Service, Customizing and Nonprofits
Privacy & Cookies!
This site uses cookies. By continuing to use this website, you agree to their use.
To find out more, including how to control cookies, see our Cookie Policy and Privacy Policy.