In the new Unified Interface your surely stumbled already over this new Subgrid layout called “List View”:
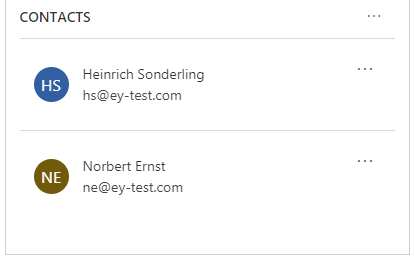
This layout will change to the “old” Grid View as soon as you allow the section to have more horizontal space. This can be done by formatting the Form (or simply make your browser window wider).
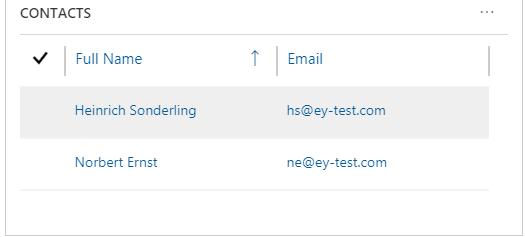
This mechanism is called “Reflow”.
But did you know that you can also determine whether you want to display the Subgrid List View or the “old” Grid View by deactivating Reflow for a certain Subgrid?
Just open the parent Form in edit mode, double click on the Subgrid => Controls =>Add Control… => choose the “Read Only Grid”.
Than you can edit the property “Reflow behavior” to fix the Grid layout to the one or the other View type.
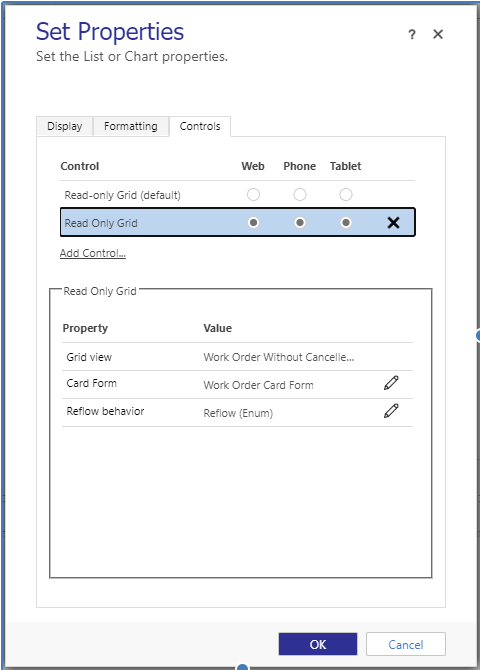
Another very nice feature is that you can customize the content displayed in the “List View” by creating a Card Form and referencing it in the Control properties (see above).
You would than be able to get something like this:
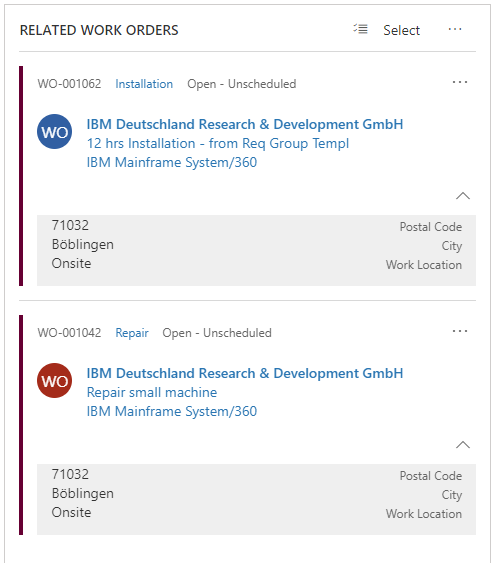
For that, create a new Form of the Type “Card” and adjust it as to your needs:
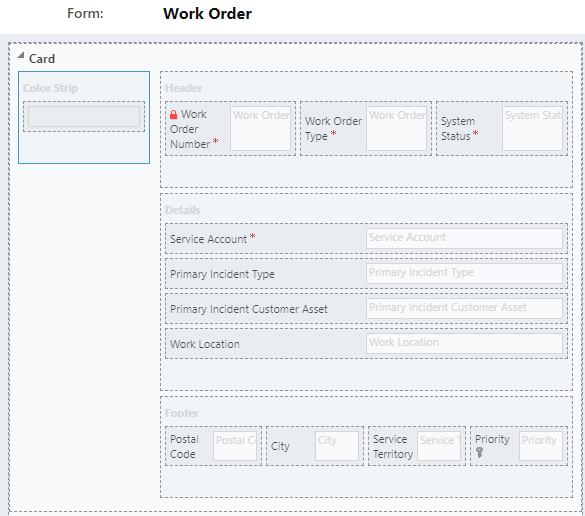
Up to now I couldn’t find out how to get the “Color Strip” working.
I tried this without success.
There is an Idea out there that indicates that it doesn’t work (yet?).
So if you know more please let me know.
You can also add more than three columns into the Card’s body and additional fields into the Header and the Footer of the Card Form.
To control whether the footer is expanded by default or not go to System Settings => “General” => “Set the default card state for Interactive Dashboards” => “Display cards in expanded state”. Sadly this setting can be done only once system wide.
But still, I’m really exited by the great capability to customize the List View.
Sources & more information:
- Sub-grid display behavior in the Dynamics 365 Unified Interface
- Card Forms and List Views in Unified Interface
Last Updated on November 22, 2021
